SCHWEIZER 1-23 R/C TOY CAR PASSO 4 A ASA "C." (STEP 4 THE WING "C")
Photo 1

Passe cola branca por toda estrutura de balsa, onde tenha contato com o isopor, e cole, prendendo com alfinetes para dar maior aderência.
(Pass glue through all balsa structure, where it has contact with styrofoam, and glue, securing with pins to give greater grip.)
(Pass glue through all balsa structure, where it has contact with styrofoam, and glue, securing with pins to give greater grip.)
Agora, faça a outra metade da asa, esquerda.
(Now, do the other half of the wing, left.)
(Now, do the other half of the wing, left.)
Photo 2

As duas metades da asa, esquerda e direita, prontas.
(The two halves of the wing, left and right, ready.)
(The two halves of the wing, left and right, ready.)
Photo 3

Para fazer a junção das asas com a fuselagem, corte quatro perfis A em bandeja de espuma. Consiga também um tubinho plastico, com um palito de madeira, que encaixe justo dentro dele.
(To join the wings to the fuselage, cut four A profiles into a foam tray. Also get a plastic tubing, with a wooden toothpick, that snaps just inside it.)
Photo 4

(To join the wings to the fuselage, cut four A profiles into a foam tray. Also get a plastic tubing, with a wooden toothpick, that snaps just inside it.)
Photo 4

Faça um furo com o mesmo diâmetro do tubinho nos dois perfis de espuma e na peça de balsa. Cole-os entre si e por dentro do último perfil de balsa, no início da asa. Colando, depois, o tubinho vermelho no furo.
(Drill a hole with the same diameter of the tube in the two foam profiles and the balsa piece. Stick them together and into the last balsa profile, at the begin of wing. Then glue the red tube into the hole.)
Photo 5

Faça um cubo de espuma com 1,5 cm de comprimento,1,5 cm de altura e 1.4 cm de largura. A partir do molde do diedro recortado da planta, faça dois furos em ângulo de 175º. Corte dois pedaços do palito de 2,5 cm que irão colados nos furos do bloco, e encaixarão no tubo plástico preso à asa.
(Make a foam cube 1/2" long, 1/2" high and 1/2" wide. From the mold of the plant dihedral, make two holes at an angle of 175º. Cut two pieces of the 1" stick that will be glue into the holes in the block, and will be fit into the plastic tube glued to the wing)
Photo 6

A partir da planta, recorte o isopor e cole dentro, o bloco de espuma com os palitos.
(Following the plant, cut out styrofoam and paste inside the foam block with sticks.)
Photo 7

Após colar o suporte das asas, faça um rasgo na espuma de reforço da fuselagem para encaixar a asa.
(After gluing the wing holder, cut the fuselage reinforcing foam to fit the wing.)
Photo 8


Photo 12

Photo 13

(After gluing the wing holder, cut the fuselage reinforcing foam to fit the wing.)
Photo 8

Seguindo a medidas da planta, faça dois quadrados de balsa e reforce com um compensado fino. Essa peça vai colada na fuselagem, e apoia o contra-pino que não deixa a asa sair da posição.
(Following the measurements of the plant, make two squares of balsa and reinforce with a fine plywood. This part is glued to the fuselage, and supports the dowel that does not let the wing leave the position.)
Photo 9

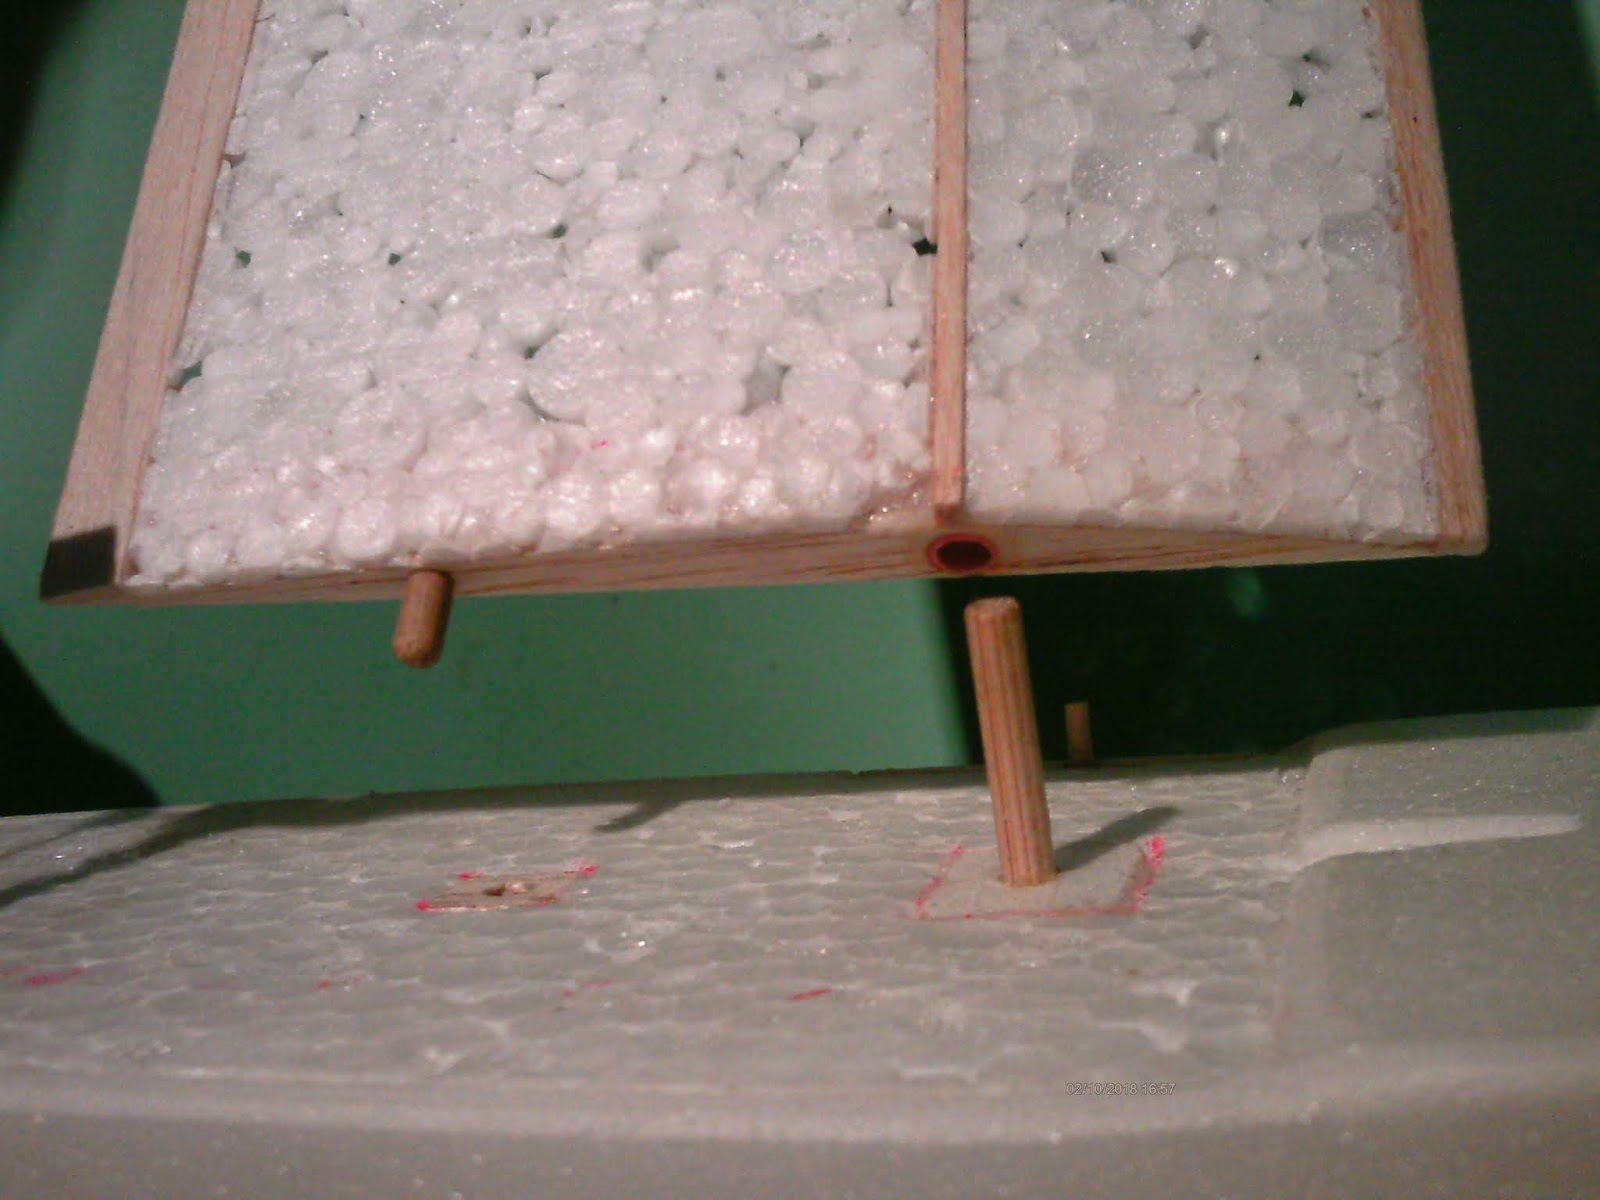
Ajuste um pino para encaixar na peça. Ele irá colado na asa.
(Adjust the dowel to fit the part. It will be glued on the wing.)
Photo 10

O suporte do contra-pino colado na fuselagem.
(The dowel pinned to the fuselage.)
Photo 11

O contra-pino colado na asa.
(The dowel glued to the wing.)
O sistema de encaixes da asa na fuselagem pronto. Seguindo a planta, reforce com nylon a base do bordo de ataque, de fuga e da longarina.
(The system of wing fittings in the fuselage, ready. Following the plan, reinforce the base of leading edge, stringer and trailing edge, with silk nylon.)

A asa presa na fuselagem.
(The wing attached to the fuselage)


Comments
Post a Comment